

How cropping fits into successful photography – composition tips, loose guidelines, and more
“ [I crop] for the benefit of the pictures. The world just does not fit conveniently into the format of a 35mm camera.”– W. Eugene Smith
Cropping will improve your work. For decades, cropping was an essential, first line skill for photographers. In recent years, it’s fallen into disuse.
That’s too bad; the art of cropping removes distractions from your images, freeing their power to present only what is essential. It’s one of the most powerful tools any photographer can use, and it’s free. All image editing programs have a crop tool for use when you don’t crop in camera.
This post shows how rediscovering the art of cropping can improve your work, and provides a downloadable file to let you create your own cropping guides, similar to what we used in the days of film, but enlarged to use with displays in the modern age.
Big Names in Photography Cropped A Lot (as do the rest of us)

Many photographic trailblazers such as W. Eugene Smith and Arnold Newman used cropping to heighten the impact of their images, removing extraneous space and content. Biographic sketches of famous photographers often show images before and after they were cropped. As they cropped, images that were pretty good were transformed into extraordinary. You can see this in the frame above, where the very famous portrait of Picasso by Newman was cropped from a section of a bigger negative, using only 35% of the original shot.
An exception to this idea was famed photographer Henri Cartier-Bresson. He believed in composing in the camera, used only one lens (50mm) for almost all his images, and printed his work with the black edge of the negative visible, showing the integrity of the full-frame shot. Most of us don’t flatter ourselves that we’re that good at in-camera composition. Instead, we crop!

Most photo studios had several of the crop tools shown at right, or a set of cardboard or plastic L-shapes. If you used a Hasselblad, its square format negatives could be cropped horizontally or vertically, and this cropping happened every day in studios around the world. Squares, although particularly cool in appearance, weren’t as appreciated by most studio customers as by aesthetes and artists, so they were less used. The ink staining the edges of the crop tool at right came from drawing crops with a Sharpie® on 5×5 preview prints.
Why Crop in the Modern Age?
The use of zoom lenses allows for in-camera cropping, and many times, in-camera cropping is a very good thing. At other times, not so much. Why would I say this?
First, most cameras don’t show you the whole frame, as a 100% viewfinder is reserved for the top end cameras. If you try to shoot precisely through viewfinders on most contemporary cameras, you’ll be surprised to find that there’s more on the edges than expected, and you’ll end up cropping anyway.

As you zoom a lens in and out, the focal length changes, as you’d expect. Not all photographers notice that the perspective changes as well, and the relationships of people and objects in the frame change as well. When these perspectives change, sometimes, something special is lost, and too many photographers are oblivious to the loss. Of course, many times, cropping in camera is desirable, and if you’ve been coveting a new zoom lens to enable this kind of cropping, don’t let this article fail to provide justification (or rationalization) for your purchase. Just be aware that sometimes, you’ll want to crop in the computer, not in the camera.
As more and more people have access to cameras in their phones, the need for cropping has never been greater. Until Apple puts a zoom lens into the iPhone, images captured with it are always recorded with a fixed focal length lens, and many times, those images will need to be cropped.
Reasons to Crop
1. You need to strengthen your image.
2. You need a panorama/square/horizontal/vertical and you have a vertical/square/horizontal/panorama.
3. You were too far away and all that negative (empty space) is too much space to rationalize as “artistic”.

4. You want to isolate what will become a great image out of a larger image frame.
5. Your file is just too large for its intended use.
6. You like using a prime lens instead of a zoom, even if you have to crop later.
7. You need to fit a specific size or height to width ratio.
8. You need to remove extraneous clutter from your image.
Contemporary cameras often deliver a larger file size than is needed for most uses. The Nikon D800 startled the photography world when it delivered 36 mp sensor, delivering huge RAW files, large enough for a 16˝ x 24˝ print at 300 ppi. New offerings from Canon and Sony go even higher, and inkjet printers don’t require 300 ppi to make acceptable prints of many subjects. If you need to shoot a file that will print with adequate resolution at a wall-covering size, you now can do so with these cameras.
As most of us rarely make 60×90 inch prints, we can crop our work with some degree of impunity, preserving some of these special perspectives without compromising on print quality. Of course, shooting with an eye toward the final composition of the image is always a good thing.
Composition and Cropping
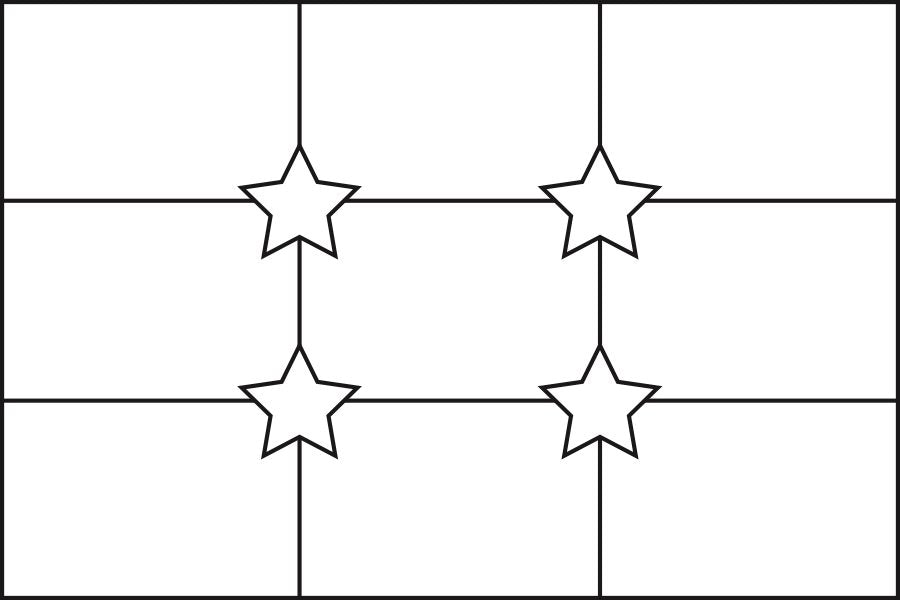
This post doesn’t have room to do a whole post on composition (watch for a future blog entry) but we can talk about a few basics. One mainstay of composition is the Rule of Thirds. Whether composing in the camera, or cropping after the image is captured, this rule is an excellent basis for improving your cropping skills. An image composed to follow the Rule of Thirds will have a center of interest at one of the four star-indicated intersections of the lines at right, which divide the rectangle into thirds both directions.
You’ve probably guessed that this conflicts directly with many people’s tendency to put the center of interest in their photo in the dead center of the frame. This leads me to three basic rules of cropping/composing, gifts from my first photo instructor, the indomitable Helen Kelley.
1 – No Bullseye Vision

There’s almost never a good reason to put your center of interest at the center. Adjust your vision so you don’t shoot bullseye compositions. Use the Rule of Thirds to make your images stronger. Subject at Left? Check. Right? Check. Center? NEVER (almost).
2 – No Locked Elbows
Some photographers never rotate their cameras to take a vertical photo. Others never rotate their phone to take a horizontal image. Unlock those elbows, my friends; they weren’t given to you to keep locked! Varying your images’ orientation, and even tossing in a square from time to time, can make your work feel fresh again. As an exercise, consider taking a set of your horizontal images, and limiting yourself to cropping vertical images out of these horizontals. You’ll discover a new way of seeing that will inform your work automatically in the future.
3 – No Locked Knees
Where is it written that you must take all your photos from eye level? Stoop shoot from a lower angle, or climb up to shoot from a higher angle. You’ll learn a whole new way of seeing, and your images will have more power as your vision improves.
These three rules have proved themselves invaluable for photographers, over and over. They use these rules every day to take their work to the next level of quality. Combine these with the Rule of Thirds, and you will quickly become a Cropping and Composition Grand Master.
Go Negative (Space, that is)
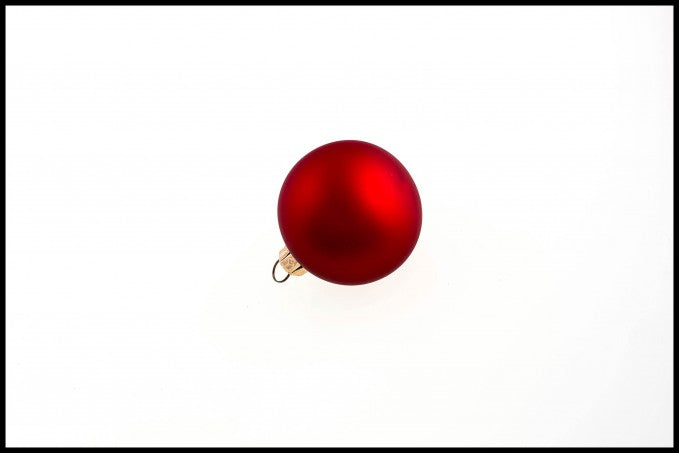

Negative space is the space in the area surrounding your image. It’s something that takes practice to master, but can make or break your composing and cropping. As a test, consider shooting something on a plain background, and shooting it with so much space around it that you can crop it in a variety of interesting ways, as in the shot shown at right. This image is a part of this blog post’s download, so you can practice with my image instead of having to create your own. Open multiple copies of this image, and crop it as an off-center vertical image, a square, an off-center horizontal, and so forth.

Consider cropping for publication, as if you were creating a cover shot, to be used with with masthead and text on the image. Put the subject on the left, then on the right, using each the 4 intersection points of the Rule of Thirds. Balance the subject against the space. The images at right show some of the possibilities; you’ll find more as you exercise your creativity.
Breaking the Rules

Once you know the rules, there are occasions when you can break them for a more powerful, successful image. However, it’s essential to master the rules before you start breaking them, not after.
Conclusion
Cropping can elevate your work from good to great, just as it did for the great masters of photography. Practice makes perfect, so start cropping and see what you can do to up your game. If you’d like an easy way to crop on screen, rather than using a crop tool in software, download the attached file to make a cropping tool for use on screen. Print or have it printed on matte board, and cut out the two L shapes. Then use it to form vertical and horizontal rectangles against images displayed on screen, to quickly see the best final crop(s) for your image.
Kevin O’Connor helps design and test software, is a graphic designer and photographer for multiple clients and companies, and fixes people’s (and companies’) color.
He has consulted to multiple companies, including Apple, Sony, Fujifilm USA, and X-Rite. He loves teaching good color practices to enthusiastic learners.
Have a Printmaking Question For Kevin?
Get Your Question Featured
on the #AskBC Podcast
We are going to feature Kevin on an upcoming episode of the podcast and would love to have him answer your printmaking questions.
If you have a question for Kevin just click the button below and leave a question.
